
May on Instagram

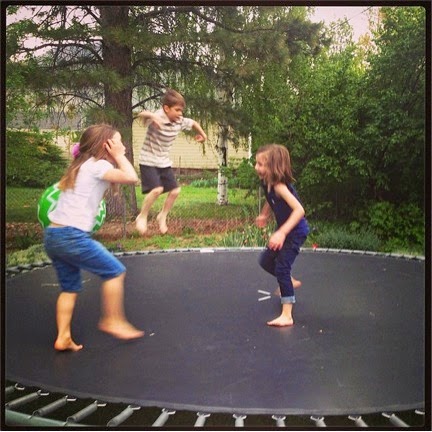
May 5th - The nieces and a nephew having a great time jumping on the
trampoline. They invited me to join in, but I had to decline.
May 9th - I just love rainy days.
May 10th - I showed up at my mom's house to find that we were matching.
Great minds think alike. :)
May 11th - My Mother's Day gifts from the husband.
May 14th - Farm Life Photo Shoot.
May 19th - The arrival of the 3rd trimester accompanied with a lot of
heartburn and swelling joints and one wiggly baby (still inside of course).
It is all worth it.
May 22nd - Facing my fears in the shark tunnel at Living Planet Aquarium. 
May 30th - Babysitting this little nephew is the best. 
May 31st - Finally can check visiting the Spiral Jetty off of my
bucket list.
May 31st - Salt, Sun, Clouds and Mountains.

Comments

  1. I love your rainy day picture and the one of the Salt Lake. I love rainy days too.

    ReplyDelete

Post a Comment

Popular posts from this blog

Oh Crafty Trees, Oh Crafty Trees...

I've become a finals widow, if you will, meaning Danny is crazy busy trying to finish up the semester.  This has given me extra time to use my crafty skills to get our place Christmas ready.  My first creations were these little paper/foam trees.  I've seen a few variations online of this craft. I put my own little twist on it.  They are really easy to make, just takes some time. Here is what you need: Scrap paper Hot glue gun 1" Circle punch Foam cone (at most craft stores) Toothpicks Note:  You are going to go to the craft store to buy the little foam cone and you will see styrofoam glue and you will think to yourself that would be a good thing to buy for this project.  Don't!  I got the styrofoam glue and it didn't work at all.  Just go with your trusty glue gun, it won't let you down. I think it's pretty self-explanatory by looking at the picture.  You just punch circles out from the scrap paper.  Then hot glue th...

The End of the Road

There is a time when things fulfill their purpose and that is how I've been feeling with this blog of mine. When I started it, I needed my own little spot to share my thoughts and random stuff I found online. However, having two blogs has become excessive. It has been a good run (me and this little blog) and thanks for joining me. For now on, I will just be posting on my family blog . It's a private blog, but send me a message or a request if you would like to view it. Thanks to those who have taken the time to read my silly thoughts or look at pictures of my cute kiddo or some craft I made. It means a lot to me. Signing off, Jannifer

The Christmas Box

Remember how forever ago I said I would post a tutorial on how to fold these cute boxes.  Sigh, life is busy.  But I am here to fulfill my promise, even if it is a bit belated.  We had a Super Saturday at church with classes we could take.  My awesome friend, Becky, taught us how to create these, so I give her all the credit. What you need, paper, scissors, ruler pencil and some type of adhesive. 1.On the blank side of your paper draw an X from each corner, using a ruler. 2. Fold the bottom corner to the  center. 3. Fold the bottom corner one more  time up to the center. 4. Now you are  going to do the exact  two folds from steps 2 and 3 to the  opposing top corner, so your  paper will look like this. 5.  Unfold your paper and make the same folds to left and right corners that haven't been folded yet.  So once again, fold the point to the middle. 6.  Do a second fold to th...